Django
https://www.djangoproject.com/
Udemy course: Build a Backend REST API with Python Django - Advanced
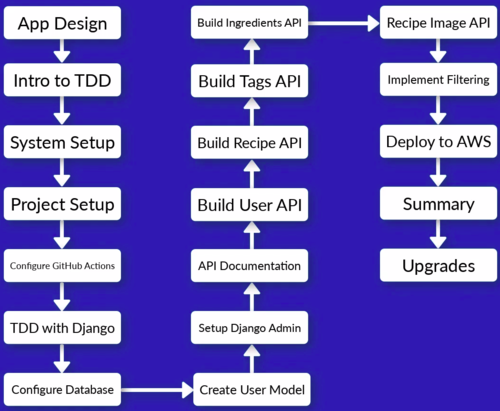
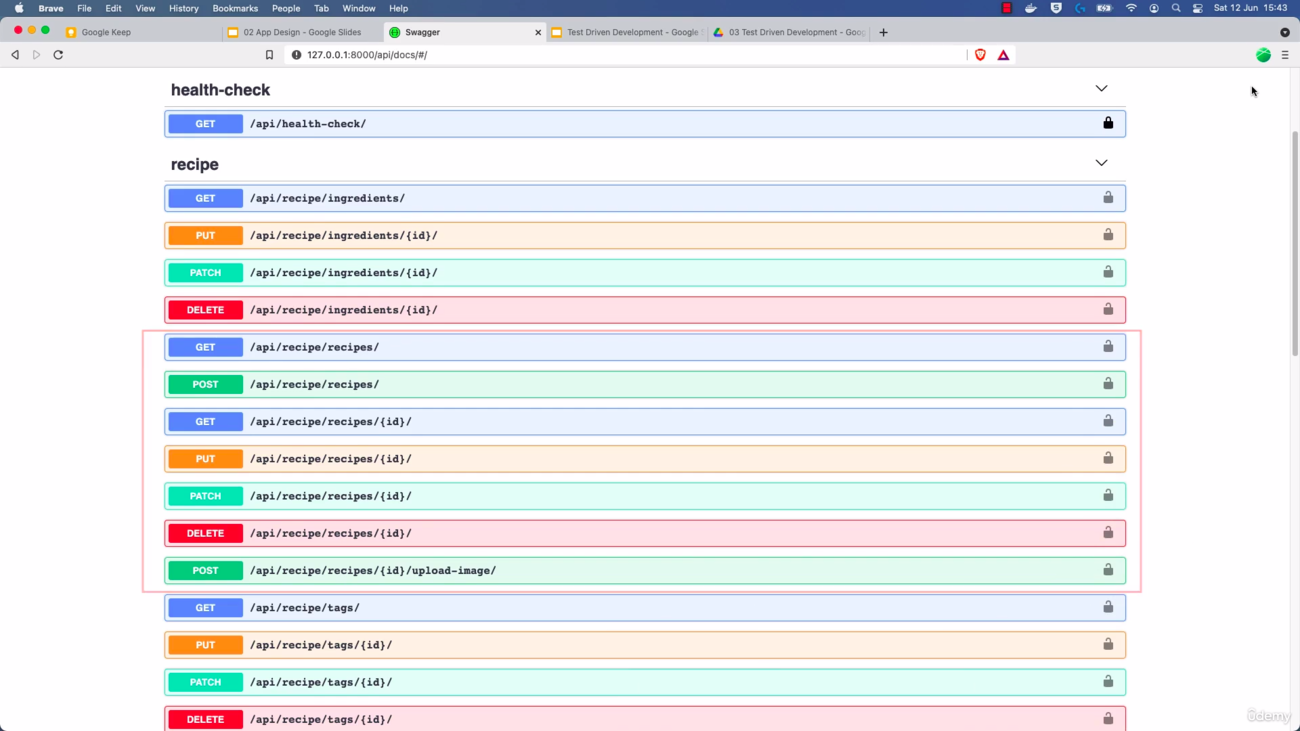
In this course we build a Recipe REST API
https://www.udemy.com/course/django-python-advanced/
|
Techologies used in this course: |
API Features: |
Structure of the project: |
|
|
|
Contents
Docker
Some benefits of using Docker Docker#Why use Docker
Drawbacks of using Docker in this project: (Not sure if these limitations are still in place)
- VSCode will be unable to access interpreter
- More Difficult to use integrated features, such as the Interactive debugger and the Linting tools.
How will be used Docker in this project:
- Create a
Dockerfile: This is the file that contains all the OS level dependencies that our project needs. It is just a list of steps that Docker use to create an image for our project:
- Firs we choose a base image, which is the Python base image provided for free in DockerHub.
- Install dependencies: OS level dependencies.
- Setup users: Linux users needed to run the application
- Create a Docker Compose configuration
docker-compose.yml: Tells Docker how to run the images that are created from our Docker file configuration.
- We need to define our "Services":
- Name (We are going bo be using the name
app) - Port mappings
- Name (We are going bo be using the name
- Then we can run all commands via Docker Compose. For example:
docker-compose run --rm app sh -c "python manage.py collectstatic"
docker-composeruns a Docker Compose commandrunwill start a specific container defined in config--rm: This is optional. It tells Docker Compose to remove the container ones it finishes running.app: This is the name of the app/service we defined.sh -cpass in a shell command
Docker Hub
Docker Hub is a cloud-based registry service that allows developers to store, share, and manage Docker images. It is a central repository of Docker images that can be accessed from anywhere in the world, making it easy to distribute and deploy containerized applications.
Using Docker Hub, you can upload your Docker images to a central repository, making it easy to share them with other developers or deploy them to production environments. Docker Hub also provides a search function that allows you to search for images created by other developers, which can be a useful starting point for building your own Docker images.
Docker Hub supports both automated and manual image builds. With automated builds, you can connect your GitHub (using Docker on GitHub Actions) or Bitbucket repository to Docker Hub and configure it to automatically build and push Docker images whenever you push changes to your code. This can help streamline your CI/CD pipeline and ensure that your Docker images are always up-to-date.
Docker Hub has introduced rate limits:
- 100 pulls/6hr for unauthenticated users (applied for all users)
- 200 pulls/6hr for authenticated users (for free)
- So, we have to Authenticate with Docker Hub: Create an account / Setup credentials / Login before running job.
Docker on GitHub Actions
Docker on GitHub Actions is a feature that allows developers to use Docker containers for building and testing their applications in a continuous integration and delivery (CI/CD) pipeline on GitHub.
With Docker on GitHub Actions, you can define your build and test environments using Dockerfiles and Docker Compose files, and run them in a containerized environment on GitHub's virtual machines. This provides a consistent and reproducible environment for building and testing your applications, regardless of the host operating system or infrastructure.
Docker on GitHub Actions also provides a number of pre-built Docker images and actions that you can use to easily set up your CI/CD pipeline. For example, you can use the "docker/build-push-action" action to build and push Docker images to a container registry, or the "docker-compose" action to run your application in a multi-container environment.
Using Docker on GitHub Actions can help simplify your CI/CD pipeline, improve build times, and reduce the risk of deployment failures due to environmental differences between development and production environments.
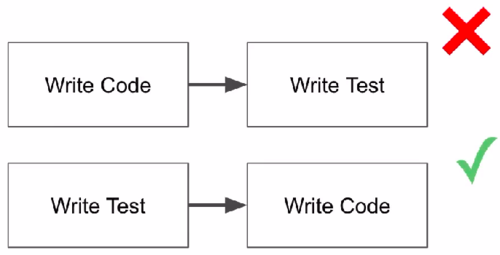
Unit Tests and Test-driven development (TDD)
See explanation at https://www.udemy.com/course/django-python-advanced/learn/lecture/32238668#notes
Unit Tests: Code which test code. It's usually done this way:
- You set up some conditions; such as inputs to a function
- Then you run a piece of code
- You check outputs of that code using "assertions"
Test-driven development (TDD)
Setting the development environment
https://www.udemy.com/course/django-python-advanced/learn/lecture/32238710#overview
- Go to https://github.com and create a repository for the project and clone it into your local machine. See GitHub for help:
https://github.com/adeloaleman/django-rest-api-recipe-app
git clone git@github.com:adeloaleman/django-rest-api-recipe-app.git
- Go to DockerHub https://hub.docker.com : login into your account. Then go to
Account settings > Security > New Access Token:
- Access token description: It's good practice to use the name of your github project repository:
django-rest-api-recipe-app - Create and copy the Access token.
- This Token will be used by GitHub to get access to you DockerHub account and build the Docker container.
- Access token description: It's good practice to use the name of your github project repository:
- Go to your project's GitHub repository : https://github.com/adeloaleman/django-rest-api-recipe-app >
Settings > Secrets and variables > Actions:
New repository secret: First we add the user:
- Name:
DOCKERHUB_USER - Secret: This must be your DockerHub user. In my case (don't remember why is my C.I.):
16407742
- Name:
- Then we click again
New repository secretto add the token:
- Name:
DOCKERHUB_TOKEN - Secret: This must be the DockerHub Access token we created at https://hub.docker.com:
***************
- Name:
- This way, GitHub (through Docker on GitHub Actions) is able to authenticate and gets access to DockerHub to build the Docker container.
- Go to your local project's directory and create
requirements.txt
Django>=3.2.4,<3.3
djangorestframework>=3.12.4,<3.13
This tells pip that we want to install at least version 3.2.4 (which is the last version at the moment of the course) but less than 3.3. This way we make sure that we get the last 3.2.x version. However, if 3.3 is released, we want to stay with 3.2.x cause this important version change could introduce significant changes that may cause our code to fail"
- Go to your local project's directory and create
Dockerfile
FROM python:3.9-alpine3.13
LABEL maintainer="adeloaleman"

ENV PYTHONUNBUFFERED 1

COPY ./requirements.txt /tmp/requirements.txt           # This copy the file into the Docker container
COPY ./requirements.dev.txt /tmp/requirements.dev.txt
COPY ./app /app
WORKDIR /app                                            # This is the default directory where our commands are gonna be run when we run commands on our Docker image
EXPOSE 8000                                             # This is the port we are going to access in our container

ARG DEV=false
RUN python -m venv /py && \                             # Creates a virtual env. Some people says it's not needed inside a Container
    /py/bin/pip install --upgrade pip && \              # Upgrade pip
    /py/bin/pip install -r /tmp/requirements.txt && \   # Install our requirements
    if [ $DEV = "true" ]; \
        then /py/bin/pip install -r /tmp/requirements.dev.txt ; \
    fi && \
    rm -rf /tmp && \            # rm /tmp cause it's not needed anymore
    adduser \                   # We add this user because it's good practice not to use the root user
        --disabled-password \
        --no-create-home \
        django-user

ENV PATH="/py/bin:$PATH"        # This is to avoid specify /py/bin/ every time that we want to run a command from our virtual env

USER django-user                # Finally, we switch the user. The above commands were run as root but in the end, we switch the user so commands executed later will be run by this user
python:3.9-alpine3.13:
pythonis the name of the image and3.9-alpine3.13is the name of the tag.alpineis a light version of Linux. It's ideal to build Docker containers cause it doesn't have any unnecessary dependencies, which makes it very light and efficient.- You can find all the Images/Tags at https://hub.docker.com
.dockerignore
# Git
.git
.gitignore

# Docker
.docker

# Python
app/__pycache__/
app/*/__pycache__/
app/*/*/__pycache__/
app/*/*/*/__pycache__/
.env/
.venv/
venv/
- Then we create the app directory insde our project directory
mkdir app
- Then we run:
docker build .
docker-compose.yml
version: "3.9"

services:
  app:
    build:
      context: .
      args:
        - DEV=true
    ports:
      - "8000:8000"
    volumes:
      - ./app:/app
    command: >
      sh -c "python manage.py runserver 0.0.0.0:8000"
- Then we run in our project directory:
docker-compose build
- ...:
docker-compose run --rm app sh -c "flake8"

docker-compose run --rm app sh -c "django-admin startproject app ."

docker-compose up


